
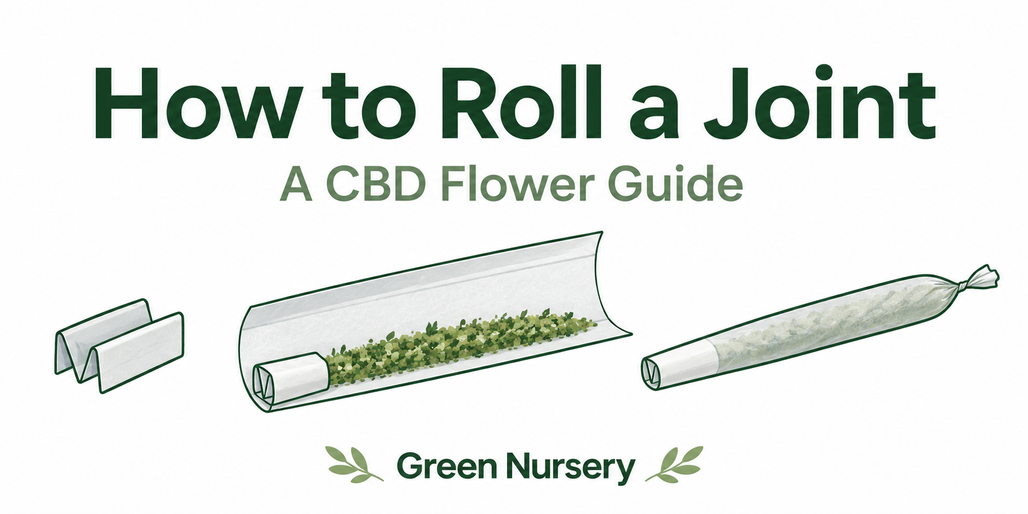
How to Roll a Joint for Beginners: CBD Flower Guide
Green Nursery Illustrated Guides
How to Roll a Joint for Beginners: An Illustrated CBD Flower Guide
Last updated
To roll a joint, break up the flower, make a paper tip, spread the flower along a rolling paper, shape it, tuck the unglued edge around the filling, then roll, seal and close the open end. The tricky part is the tuck. Start beside the paper tip, where you have something firm to hold.
This illustrated guide uses CBD flower as the example and keeps the mouthpiece on the left throughout. If the flower itself is new to you, start with our guide to CBD buds and hemp flower.
What you need to roll a joint
- Loose flower: remove noticeable stems and seeds before rolling.
- Rolling papers: a standard 1¼-size paper is a practical place to begin. Use paper made for rolling.
- A paper tip: also called a crutch or filter tip. Purpose-made tip papers or pre-rolled paper tips keep this simple.
- A grinder: useful for breaking the flower into similar-sized pieces.
- A clean tray: catches anything that falls while you learn.
- A small, blunt packing tool: narrow enough to fit the open end without stretching the paper.
Wash and dry your hands first. Keep the paper dry until the sealing step. You do not need a lighter to learn the rolling sequence, and you can stop once the finished roll is closed.
Can you roll a joint with CBD flower?
Yes. Loose CBD hemp flower can be prepared in rolling paper using the same basic hand movements. For a concrete store example, Green Nursery Lifter CBD flower is sold as loose flower rather than a finished joint. You can compare other loose-flower options in our CBD flower collection.
The rolled format does not determine the cannabinoid profile. The CDC distinguishes CBD from THC: CBD itself does not produce the characteristic THC high, but products labeled CBD can contain THC. Check the actual product information rather than assuming CBD flower is THC-free.
Match the product and batch to the available lab results. Our CBD flower lab-report guide explains the entries to review. The amount that fits inside a paper is not a recommended amount to consume.
How to roll a joint, step by step
Follow one movement at a time. Keep the gum strip dry while you arrange and shape the flower, so you can reopen the paper if you need to.
Step 1: Grind the flower
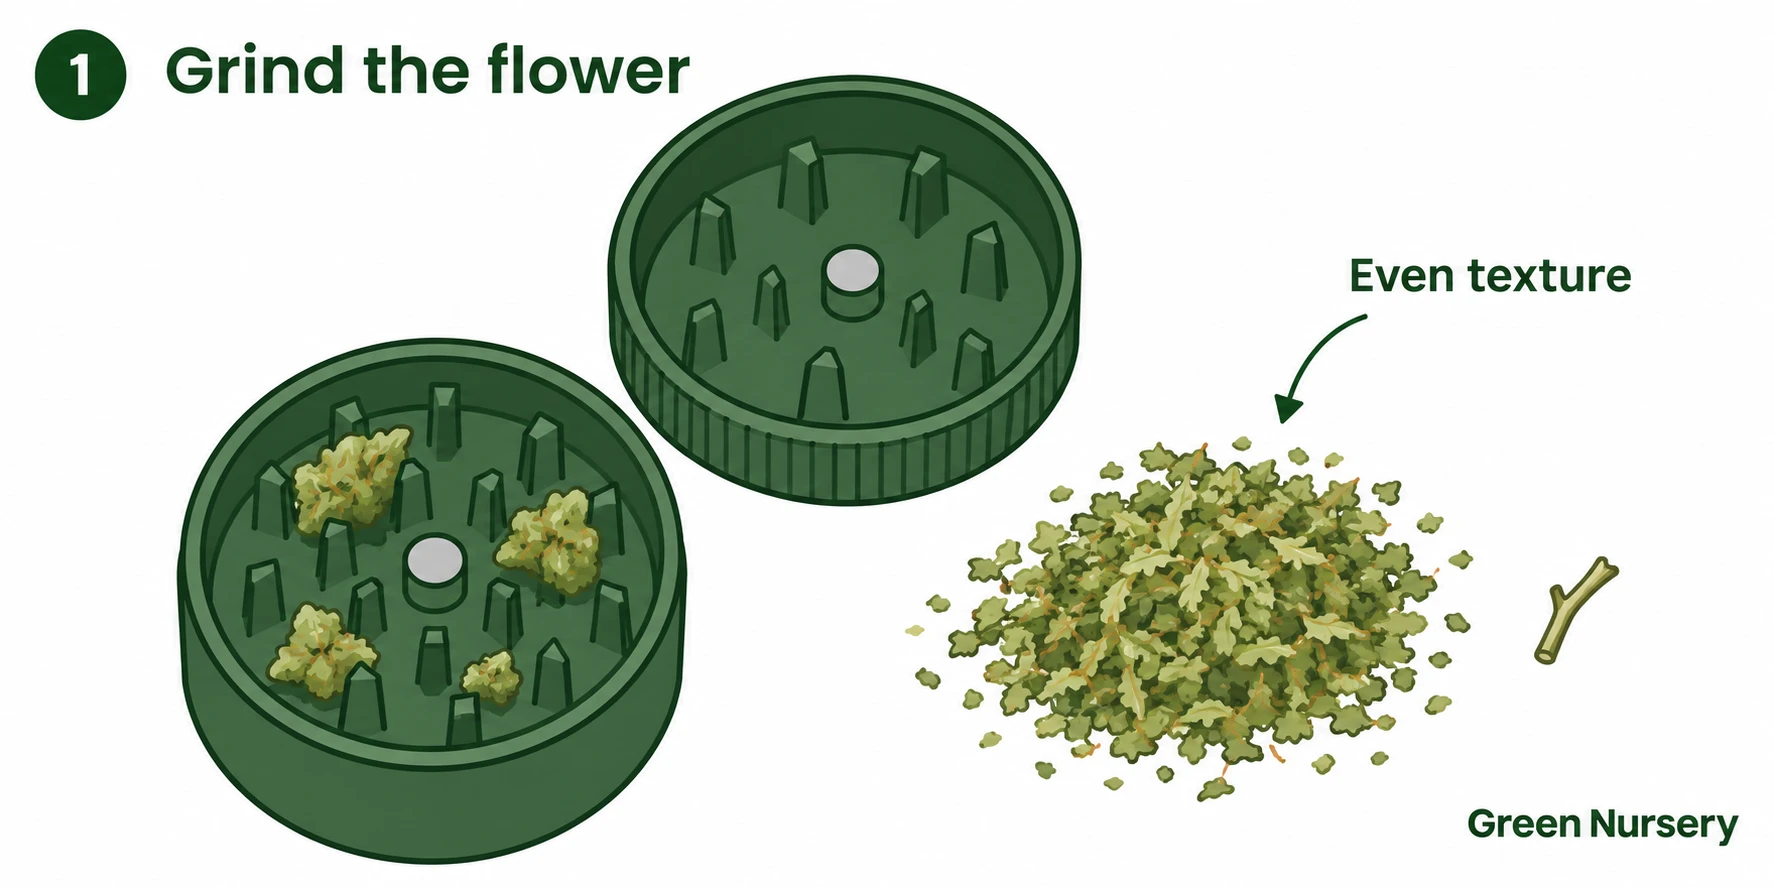
Pull the flower into smaller pieces, remove obvious stems or seeds, and use the grinder to create a loose, consistent texture. Look for small flakes rather than a few large lumps or a pile of powder.
Spread the ground material on the tray and check it before filling the paper. A remaining stem can catch or puncture the wrapper.
Step 2: Make the paper tip
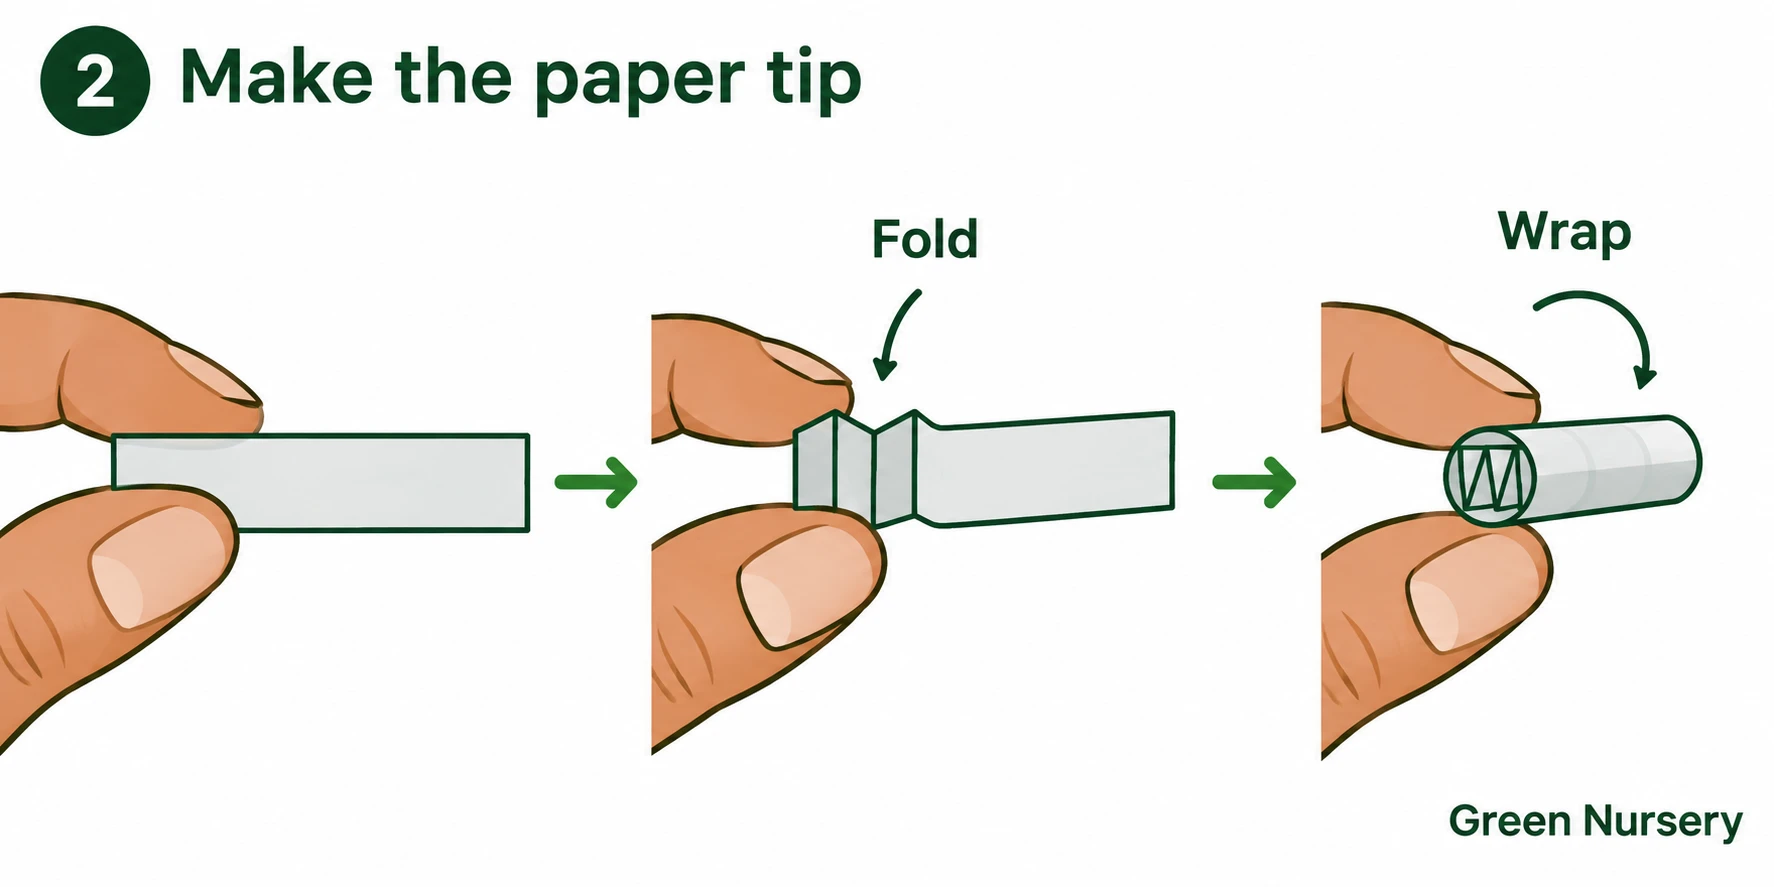
Take a purpose-made tip paper. Make a few small back-and-forth folds at one short end, forming a W. Wrap the remaining strip around those folds to make a short cylinder.
Keep a passage through the middle instead of crushing the folds flat. This tip gives the mouthpiece structure and helps hold loose flower back. Calling it a filter does not mean it makes smoke safe.
Step 3: Fill the paper
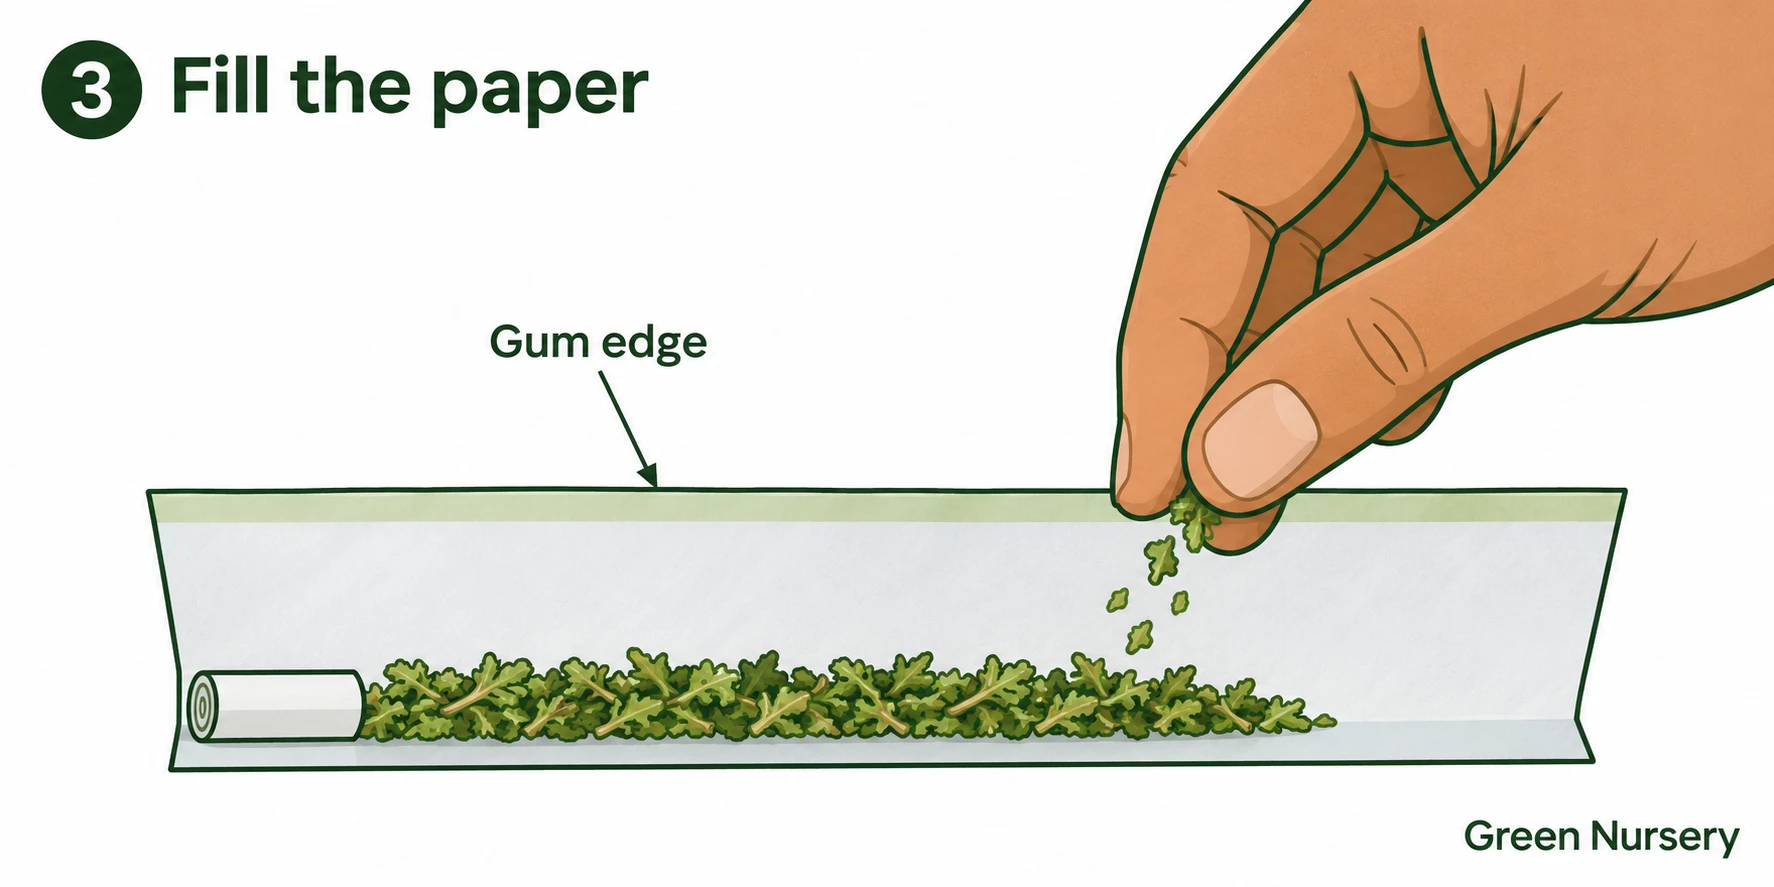
Open the paper into a shallow trough. For this standard outside roll, place the gum strip along the long edge farthest from you, facing inward and up. The unglued long edge should be nearest you.
Set the tip at the left end. Add a modest row of flower beside it, leaving some empty paper at the right end for closing. Smooth out large mounds and bare gaps. If the flower nearly reaches the gum strip, remove some before continuing.
Step 4: Shape the flower
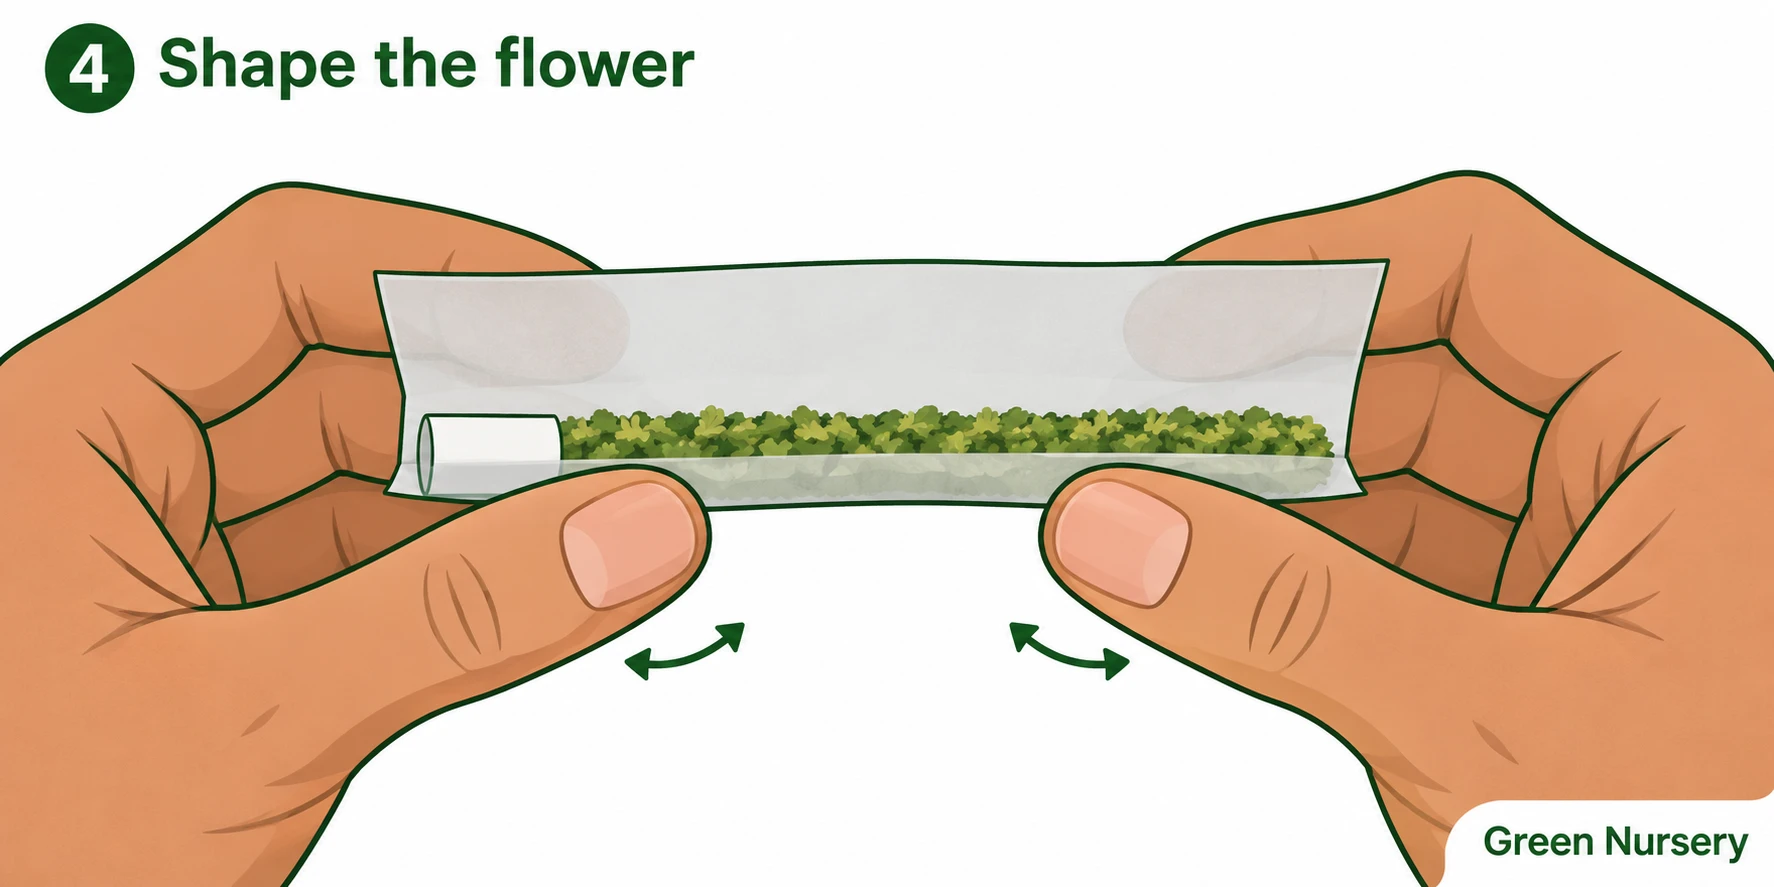
Lift the paper with your thumbs in front and your index fingers supporting it from behind. Gently rock the two sides of the paper back and forth. The flower should begin forming a slim log beside the tip.
Keep the gum edge exposed. You are shaping the contents at this stage, not sealing them. If the middle has a large bulge, reopen the paper and redistribute the filling.
Step 5: Tuck the front edge
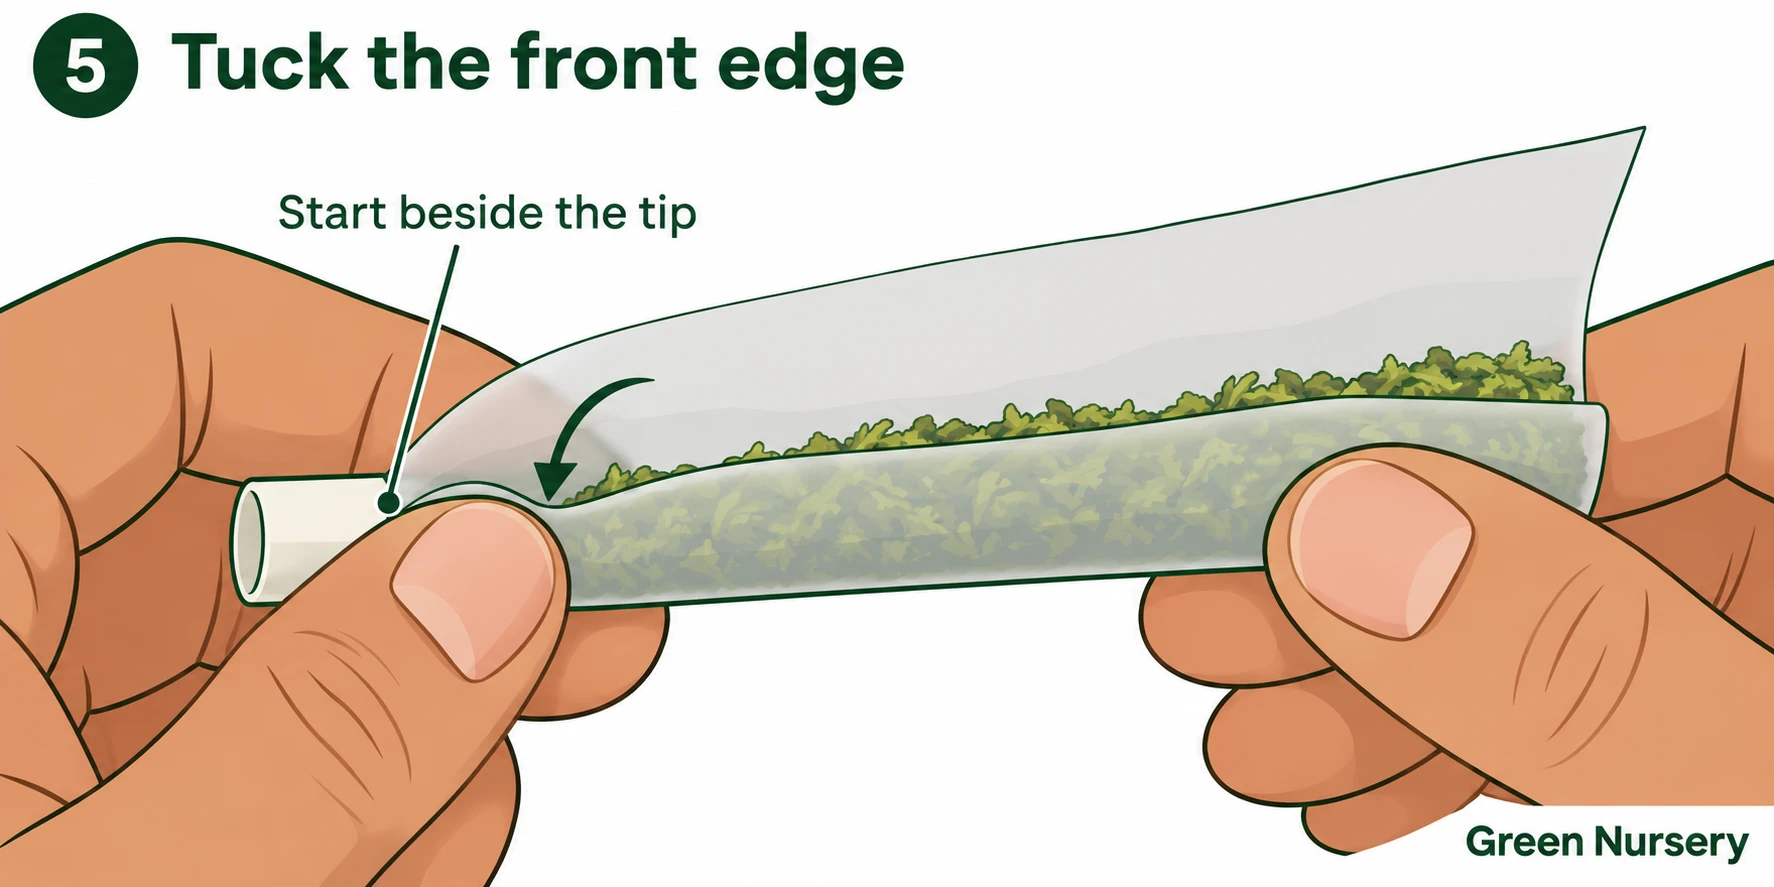
Hold the tip steady with your left hand. Lower the near, unglued paper edge until it sits just below the top of the shaped filling. Use your thumb to guide that edge snugly around the flower and into the space beneath the far side of the paper.
Start next to the tip, then work toward the right. Once that first section catches, it gives you a starting point for the rest of the tuck. If the edge keeps buckling, back up, reshape the filling, and try again before adding moisture.
Step 6: Roll and seal
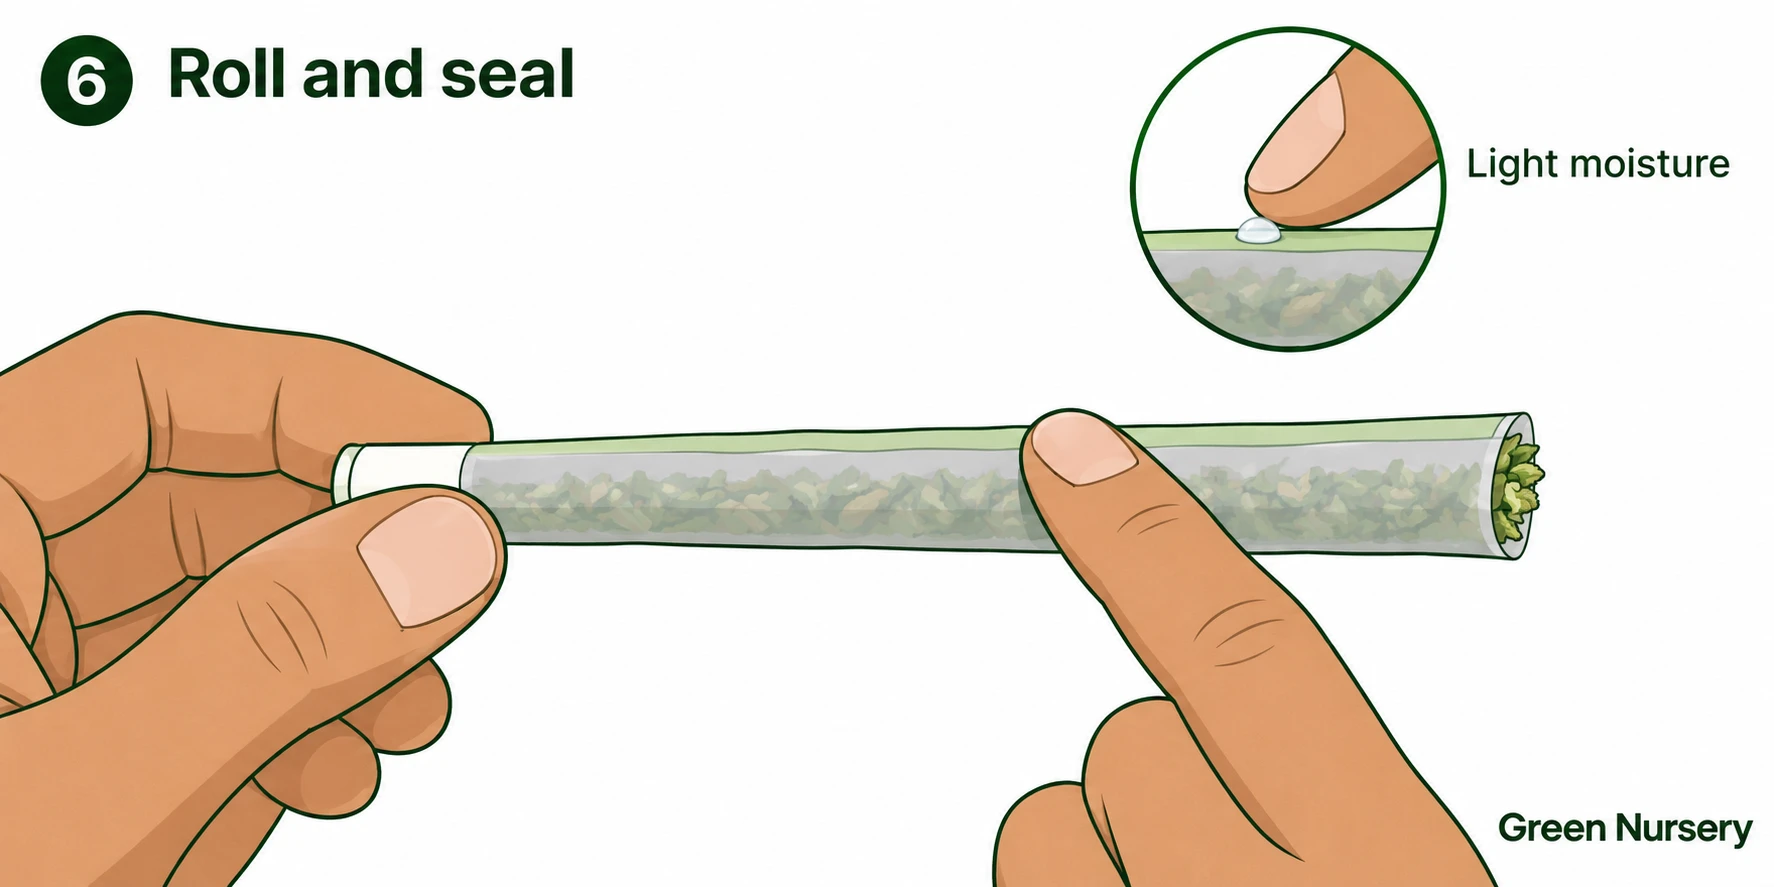
With the front edge tucked, continue rolling the paper around the filling until only the gum strip remains exposed. Lightly moisten the strip according to the paper maker's directions, then finish the roll and press along the seam.
A little moisture is enough. Avoid soaking the entire wrapper. Let the seam set before handling the roll further. The right end should still be open.
Step 7: Settle the open end
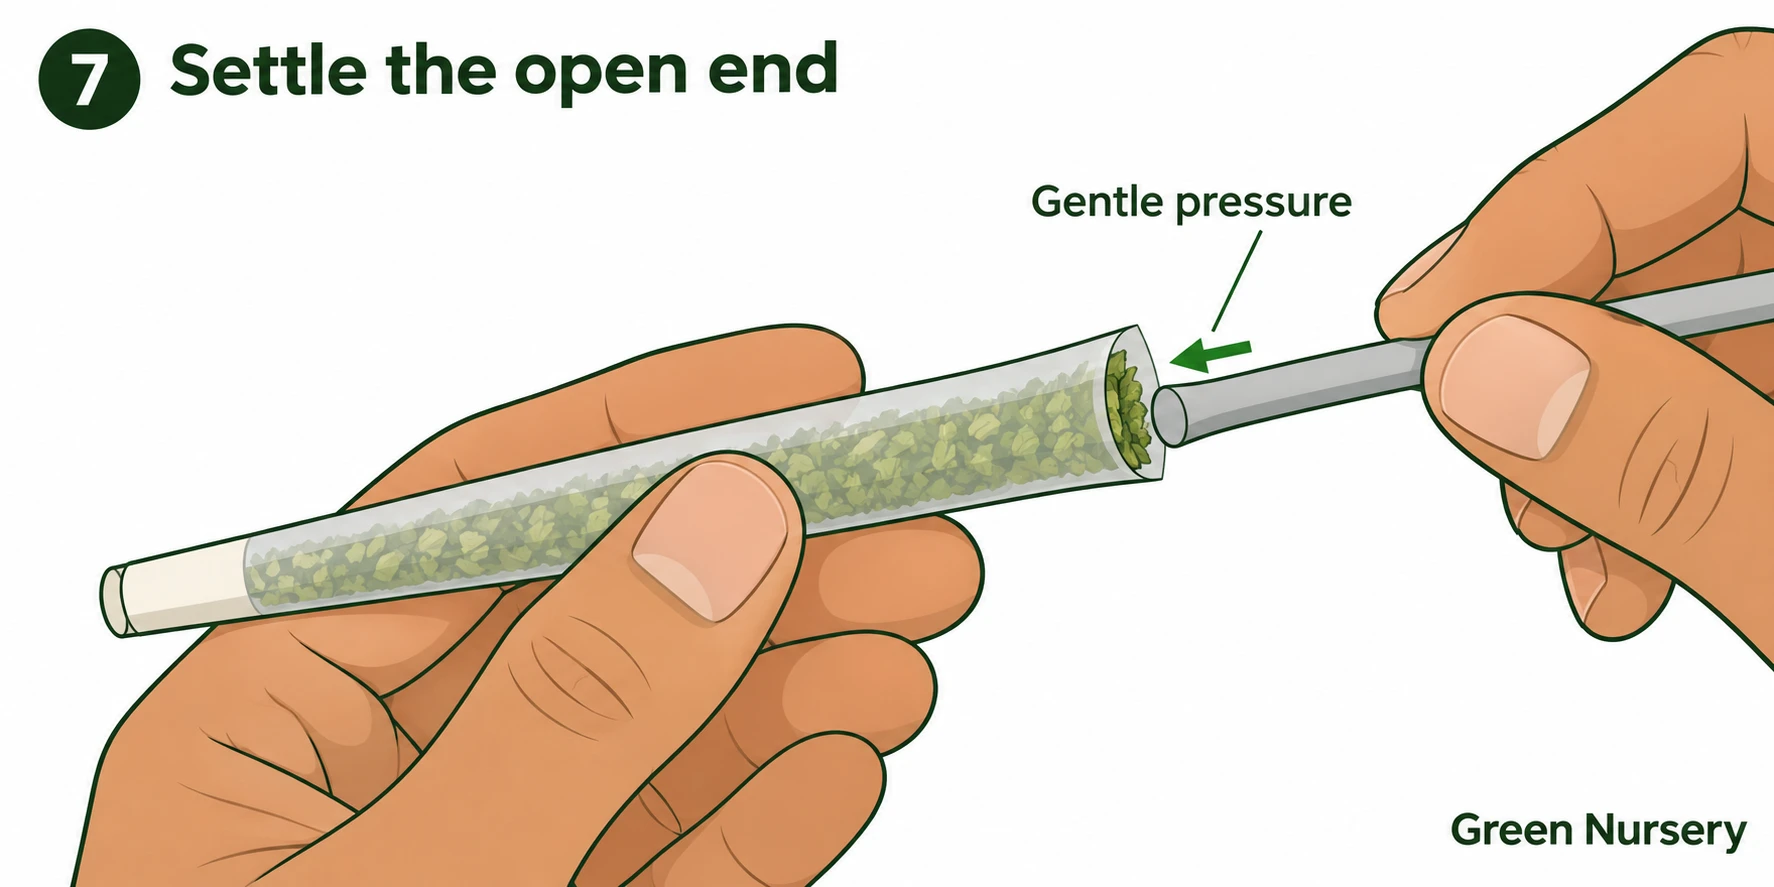
Support the roll without squeezing it. Use the blunt end of a clean packing tool to settle loose flower just inside the opening on the right. Leave a little empty paper beyond the filling.
The goal is to close obvious gaps, not force more material into an already full roll. Stop if the wrapper starts bulging or the tool meets firm resistance.
Step 8: Twist the end closed
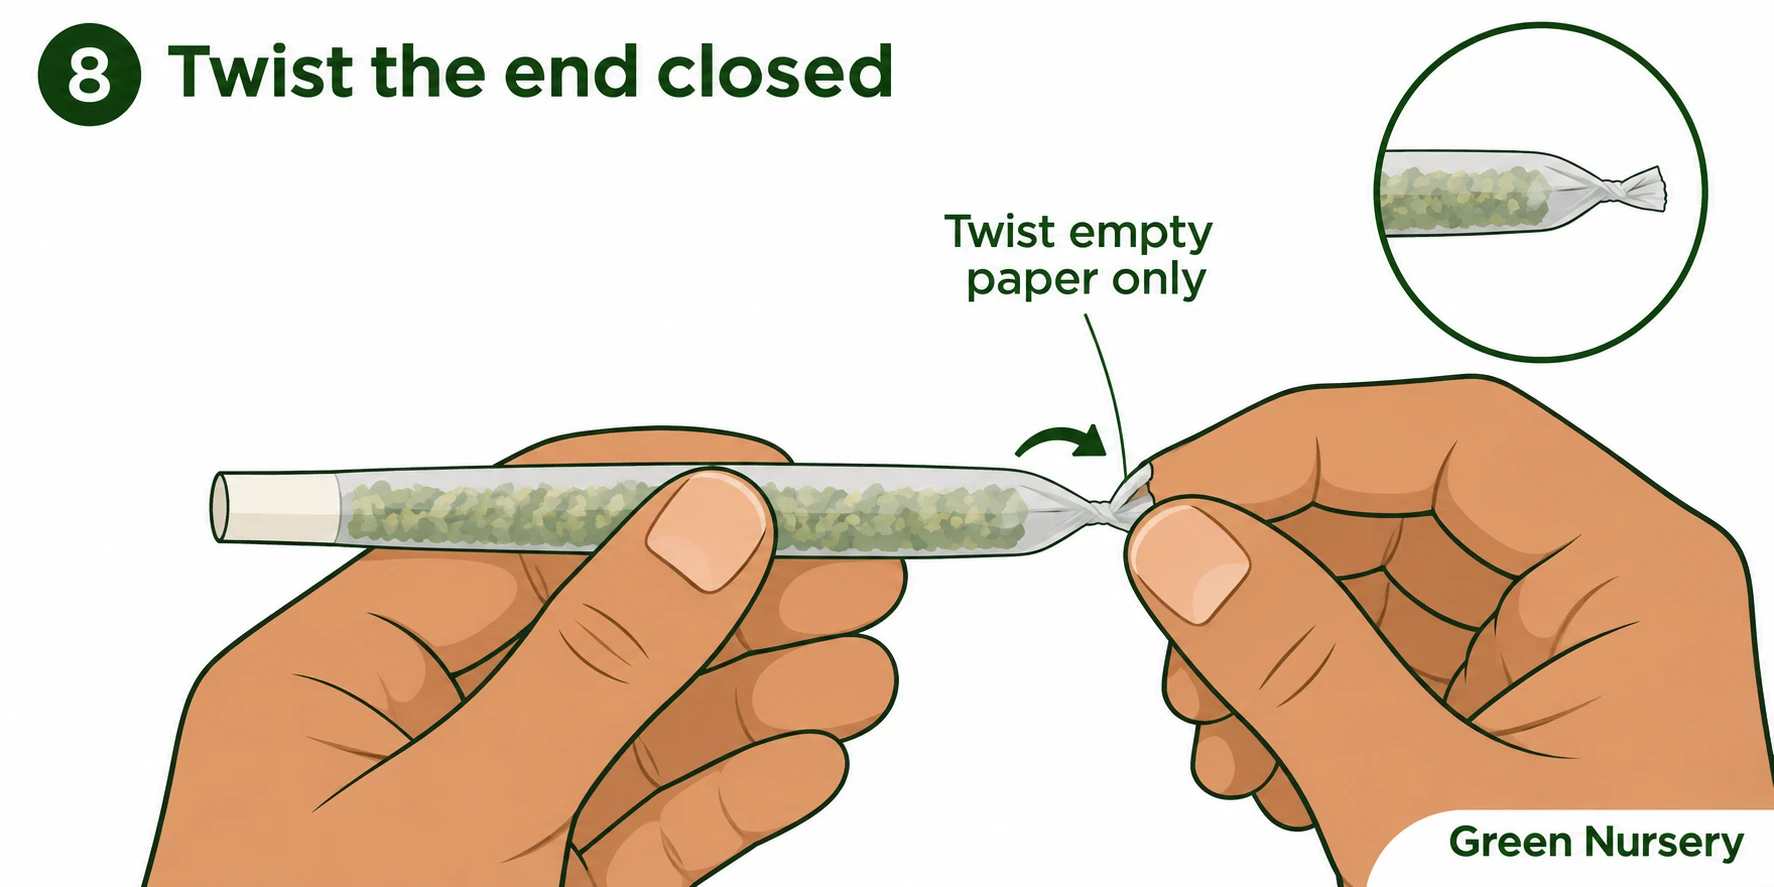
Pinch the empty paper above the flower and give it a small twist to keep the contents from spilling. Hold the body steady so you do not twist the entire roll or tear the seam.
Check that the tip is secure, the seam is closed, and there are no obvious holes. Your first roll can be slightly uneven and still teach you exactly what to adjust next time.
Fixing common rolling problems
Change one thing on the next attempt so you can tell what helped. Zig-Zag's beginner rolling guidance also identifies overfilling, excessive moisture and inconsistent packing as common problems.
- The paper will not tuck.
Check for too much flower or a lump beside the tip. Remove a little, shape the row again, and begin the tuck against the firm mouthpiece.
- The middle is bulging.
Redistribute the flower before sealing. More pressure on the wrapper usually does not fix an uneven mound underneath it.
- The seam keeps lifting.
Check that you identified the gum strip correctly. Use light, even moisture and press the seam closed. Replace a badly soaked or damaged paper.
- The finished roll is packed too tightly.
Use less flower and less pressure on the next attempt. If the current roll is clearly overcompressed, reopening it is more useful than forcing a tool through it.
- The tip slips out.
Check the fit before sealing. Hold the tip in position while making the first tuck instead of trying to tighten everything from the middle.
- The paper tears.
Look for a stem, excessive moisture, or a sharp packing tool. Transfer the filling into a fresh paper rather than adding household glue or tape.
Would a preformed cone be easier?
A preformed cone already has its paper body and tip assembled. You add ground flower through the open end, settling it gently as you go. That lets you work with loose flower while skipping the hand tuck and gum-sealing steps.
Filling a cone and rolling a flat paper are different tasks. If learning the hand movement is your goal, practice the tuck. If you mainly want to prepare loose flower without that movement, a preformed cone may be more convenient.
Frequently asked questions about rolling a joint
What is the easiest way to roll a joint for beginners?
Use a paper tip, keep the filling modest, and begin the tuck beside the tip. Those choices give you a firm starting point and room to move the paper. A preformed cone is another option, but it skips hand rolling.
Which way should the gum strip face?
In the method shown here, it sits along the far long edge, facing inward and up. The near edge is unglued and gets tucked first. Other rolling methods exist, so keep your setup consistent while learning this one.
Can I roll a joint without a grinder?
Yes. Break the flower into small, similar-sized pieces with clean, dry fingers and remove stems. Avoid leaving large chunks in the middle of the paper.
Do I need a filter tip?
A tip is optional, but it provides a firm mouthpiece to hold during the tuck. Purpose-made paper tips are convenient for practicing. A simple rolled-paper crutch is a structural mouthpiece, not a guarantee of smoke filtration or safety.
How much flower should I put in the paper?
Use enough to form a slender, even row while leaving room for the paper to wrap around it. Paper size, tip size and grind change the fit. Start by removing excess rather than forcing an overfilled paper closed. Capacity is not a consumption recommendation.
Is rolling CBD flower different from rolling THC flower?
The basic paper-handling technique is the same. The cannabinoid profile and potential effects are a separate question. Our guide to CBD flower, THC content and intoxication explains that distinction.
Is a joint the same as a blunt or spliff?
The terms describe different rolled formats. A joint generally uses rolling paper; a spliff commonly includes tobacco, and a traditional blunt uses a tobacco-based wrapper. For more context, see our history of joints and related formats.
Popular Products
Check out these customer favorites.